I still remember the smell of burnt ozone and cheap polyester from that first shared studio space I worked in, staring at a box of fifty hoodies that looked nothing like the tech pack I’d spent weeks perfecting. I’d skipped the step of sampling before a production run because I was too stoked about the “launch date” and too broke to pay for an extra prototype. It was a massive, expensive mistake that taught me more about garment construction than my entire BA ever did. Most people will tell you that sampling is just a “check-box” exercise or an extra cost to be trimmed, but in reality, it’s the only thing standing between you and a warehouse full of unsellable junk.
I’m not here to give you a sanitized, corporate lecture on supply chain management. Instead, I’m going to pull back the curtain on what you actually need to look for when a sample hits your desk—from the way the grainline sits to whether that GSM is actually going to hold up after three washes. I’ll show you how to spot the red flags in a prototype so you can stop gambling with your margins and start building something that actually lasts.
The Prototype Validation Process Protecting Your Brand Integrity
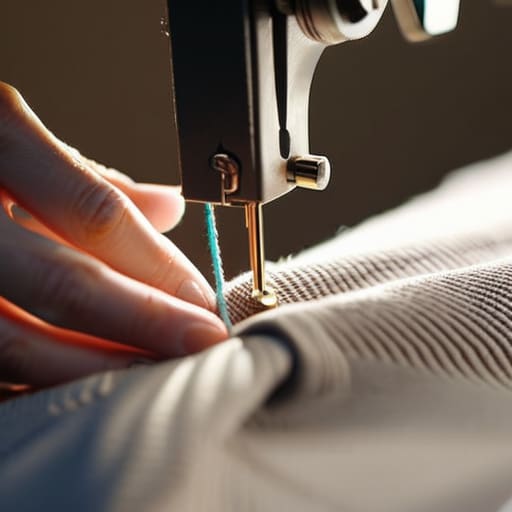
This is where the actual work happens. I’m not just talking about checking if the color looks “vibey” under studio lights; I’m talking about a rigorous prototype validation process that treats your garment like a piece of engineering. When I’m looking at a sample, I’m flipping it inside out immediately to inspect the overlocking and the tension of the threads. If the seam allowance is too narrow or the stitching is puckering, it doesn’t matter how sick the graphic print is—the piece is going to fall apart after three washes.
You need to treat your manufacturing sample approval workflow as your final line of defense. I’ve seen too many small labels rush into a bulk order because they were “too excited” to launch, only to realize their sizing was completely off across the entire size run. Use this stage to stress-test everything: wash the sample, wear it for a full day, and check how the fabric drapes against the body. If it doesn’t pass your personal standard operating procedure for samples, do not let it hit the production line. Your brand’s reputation lives or dies in these tiny, technical details.
Reducing Production Errors Through Sampling to Save Your Bottom Line
Look, I’ve been in enough shared studios to know that “close enough” is a lie that eats your profits alive. When you skip a proper manufacturing sample approval workflow, you aren’t just saving time; you’re basically rolling the dice on your entire inventory. I’ve seen brands get hit with a thousand units of hoodies where the neck ribbing is so thin it looks like cheap lace after one wash. That isn’t just a mistake; it’s a massive hit to your reputation that you can’t just “market” your way out of.
The real magic happens when you use your samples as a way of reducing production errors through sampling before the machines ever start humming. I’m talking about checking the tension on the seams, seeing how the fabric reacts to the specific print ink you’ve chosen, and making sure the sizing isn’t wildly off from your tech pack. If you treat your pre-production testing protocols as a chore rather than a safety net, you’re going to end up paying for it—either in wasted fabric or in a mountain of customer returns.
My Non-Negotiable Checklist for Not Wasting Your Fabric
- Wash the damn sample first. I don’t care if it looks perfect right out of the machine; you need to see if that high-GSM cotton actually holds its shape or if it’s going to shrink into a crop top after one cycle.
- Turn it inside out and obsess over the seams. If the overlock stitching looks messy or the thread tension is off on your sample, it’s going to be ten times worse when you’re looking at five hundred units in a factory.
- Check the hardware and trims against your actual specs. There is nothing worse than receiving a finished run only to realize the zippers are flimsy or the buttons feel like cheap plastic compared to the premium vibe you were aiming for.
- Don’t just look at the garment; look at the construction logic. If the pattern cutting on the sample makes the sleeves twist awkwardly when you move, that’s a structural flaw that no amount of marketing hype can fix later.
- Get a “Gold Sample” and lock it down. Once you finally have a version that hits every single mark, keep it as your physical bible to compare against the bulk shipment so the factory can’t pull any fast ones on you.
The Real-World Bottom Line
Treat your sample like a blueprint, not a suggestion; if the seam allowance is off or the GSM feels flimsy in the prototype, it’s going to be a disaster at scale.
Stop treating sampling as an extra expense and start seeing it as your only real insurance policy against a warehouse full of unsellable deadstock.
Use the sample stage to actually test the garment’s life cycle—wash it, wear it, and turn it inside out—because if it doesn’t hold up in your hands, it won’t hold up in your customers’ closets.
Frequently Asked Questions
How many different samples do I actually need to see before I can trust a factory with my full order?
Look, if you think one sample is enough, you’re playing a dangerous game with your bank account. At a bare minimum, you need a proto—to check the silhouette—and then a pre-production sample (PPS) that uses your actual fabric and trims. I’ve seen too many people skip the PPS because they were “in a rush,” only to receive a thousand units of literal trash. Don’t settle until the PPS is perfect.
Is it worth paying the premium for a tech pack, or can I just send a photo of a shirt I like and hope for the best?
Look, I get it—tech packs feel like an expensive headache when you just want to get moving. But sending a photo and “hoping for the best” is how you end up with a garment that fits like a trash bag. A photo shows the vibe, but a tech pack tells the factory exactly where the seams go and what the GSM needs to be. Pay the premium. It’s cheaper than a thousand wasted blanks.
What are the specific red flags I should look for when a sample finally arrives in the mail?
First, turn it inside out. If the seam allowances are uneven or there’s loose thread nesting in the corners, that’s a massive red flag for the whole factory. Check the grainline too—if the shirt twists after one hang, the fabric was cut off-grain, and your whole batch will be crooked. Also, pull at the print; if it cracks or feels like a thick plastic sticker rather than sinking into the fibers, run.

