I was standing in the middle of my shared studio three years ago, staring at a pile of perfectly decent heavyweight blanks that I’d just ruined because I thought I could “wing” the tailoring. I thought taking in a shirt was just a matter of pinning the sides and sewing a straight line, but I quickly learned that if you don’t respect the grainline or the original side seams, you end up with a garment that twists around your torso like a cheap souvenir tee. It’s a heartbreaking way to waste good fabric, and honestly, it’s a rite of passage I’d rather you skip.
In this guide, I’m cutting through the fluff to show you how to actually reshape a garment without destroying its structural integrity. We aren’t just talking about making things tighter; we’re talking about preserving the silhouette so it looks intentional rather than hacked together. I’ll walk you through the technical stuff—from managing your seam allowances to ensuring your darts don’t create weird puckers—so you can stop settling for “close enough” and start making clothes that actually fit the way they were meant to.
Guide Overview
Tools & Supplies
- Sewing machine or hand needle for stitching
- Fabric scissors for trimming excess material
- Seam ripper to remove old seams or mistakes
- Pins to hold fabric in place during fitting
- Thread matching the shirt color
- Chalk or fabric marker for marking new seam lines
- Measuring tape to determine the new fit
Step-by-Step Instructions
- 1. First things first, you need to turn that shirt inside out. I know, it feels counterintuitive, but you need to see exactly where the structural integrity is being compromised. Pin the excess fabric along the side seams, starting from the armpit and working your way down to the hem. Don’t just eyeball it; use sewing pins to create a new, tighter line that follows your body’s natural shape without making it look like you’re wearing a corset.
- 2. Once you’ve pinned your new silhouette, take the shirt off and put it back on the right side out. Stand in front of a mirror and check the drape. This is where most people mess up—they pin it too tight and end up with unnatural pulling across the chest or hips. If the fabric is bunching or looking strained, let those pins out a bit. You want a tailored look, not a vacuum-sealed one.
- 3. Now, grab your fabric chalk or a fine-tip pen and trace along the pins you just set. I always leave a little bit of a buffer zone—about half an inch—between my pins and my actual stitch line. If you sew directly on the pin line, you’re leaving zero room for error, and once you cut that fabric, there is no going back.
- 4. It’s time to hit the machine. Start sewing along your chalk line, but pay close attention to the armpit junction. This is the highest-stress point of the garment. If you take the seam too high or too sharp, you’re going to rip the seam the first time you reach for your coffee. Keep your stitches consistent and your tension even so the seam doesn’t pucker.
- 5. Once you’ve finished the run, don’t just celebrate and call it a day. You have to trim the excess. Use sharp shears to cut away the leftover fabric, but again, leave a seam allowance. If you cut too close to your new stitch line, you’re basically asking for the whole side of the shirt to unravel the moment it hits the wash.
- 6. The final, most underrated step is finishing the raw edges. If you don’t zigzag stitch that new edge or use a serger, that raw fabric is going to fray like crazy. I prefer a clean finish because if you’re going to spend time re-engineering a garment, you might as well make it look like it was built that way from the start.
Mastering Sewing Machine Settings for Fabric Integrity
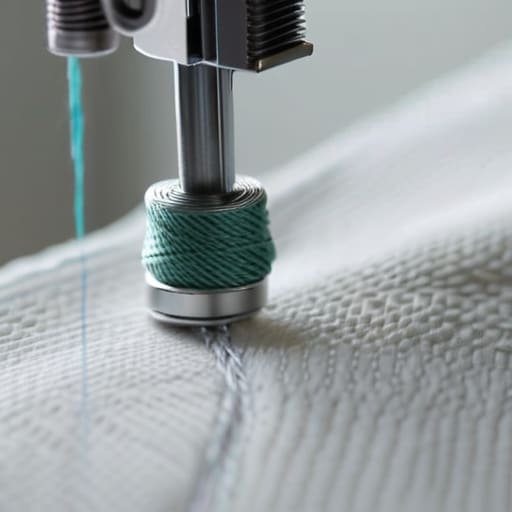
Before you even touch the pedal, you need to stop treating your machine like a one-size-fits-all tool. If you’re working with a heavy 300 GSM cotton tee, your standard tension settings are going to pucker the fabric, and suddenly your clean line looks like a crumpled mess. I always tell people: test your tension on a scrap piece first. If the thread is pulling too tight against the weave, you aren’t just altering the shape; you’re compromising the structural integrity of the garment.
When you’re sewing side seams for better fit, pay close attention to your stitch length. For most jersey knits, a slightly longer stitch prevents that annoying “roping” effect along the new seam. If you’re trying to figure out how to taper a shirt waist without creating a weird bulge at the hip, don’t just crank the machine speed. Slow down. Precision beats velocity every single time, especially when you’re navigating the curves of a body. If the machine sounds like it’s struggling, it’s probably because your needle is too blunt or your pressure foot is fighting the weight of the textile.
How to Taper a Shirt Waist Without Losing Structure
The biggest mistake I see when people try how to taper a shirt waist is that they treat it like a straight line from the armpit to the hip. If you just sew a diagonal line down the side, you end up with this weird, tent-like shape that looks totally unnatural. You have to think about the body’s curves. Instead of one long, aggressive stitch, try creating a slight curve that follows the natural contour of the torso. This is one of those tailoring techniques for beginners that makes the difference between a garment that looks “altered” and one that actually looks custom-made.
Before you even touch the machine, get your pins in place. I cannot stress this enough: don’t just pin and pray. Use plenty of pins to map out the new shape, then step back and look at it from a distance. I always turn the shirt inside out to check the tension of the new seam; if the fabric is bunching or pulling awkwardly, your taper is too steep. You want to focus on sewing side seams for better fit by gradually narrowing the width rather than making sudden, sharp changes in the silhouette.
Five Ways to Avoid Making Your Shirt Look Like a DIY Disaster
- Pin from the inside first. I know, it sounds obvious, but if you’re pinning from the front, you’re going to end up with weird puckers and visible marks that ruin the drape. Turn it inside out, find your new line, and make sure the fabric lays flat before you even think about touching a needle.
- Watch your grainlines like a hawk. If you take in a shirt by just pulling the fabric tight at the sides without respecting how the weave sits, you’re going to end up with a twisted hem that looks like it was cut by a toddler. The shirt needs to hang straight, not spiral around your torso.
- Don’t just chop and change; remember the armholes. A common mistake is tapering the waist so aggressively that you actually mess with the shape of the armscye. If you tighten the side seam too high up, you’re going to lose that natural shoulder drop and end up with a garment that feels like a straitjacket.
- Test your tension on a scrap of the same weight. If you’re working with a heavy 300 GSM jersey, a standard setting will snap your thread or create those annoying little waves along the seam. Don’t guess—grab an old scrap of the same fabric and see how it reacts before you commit to the actual garment.
- Finish your raw edges immediately. There is nothing worse than taking in a beautiful vintage tee only to have the new seam start unravelling in the wash because you were too lazy to zigzag or serge the edge. If you want the shirt to actually last, treat the inside with as much respect as the outside.
Don't Turn a Quick Fix into a Total Mess
Respect the original architecture; if you’re taking in a heavy-weight blank, you have to account for that GSM or you’ll end up with weird, puckered seams that look like a mistake rather than a tailored fit.
Always prioritize the seam allowance over your desire for a slim silhouette; if you cut too close to the edge to get that “perfect” look, you’ve left yourself zero room to breathe or fix a mistake later.
Check your tension twice before you commit; there is nothing more soul-crushing than realizing you’ve sewn a beautiful taper only to have the thread bunch up because you didn’t adjust for the fabric weight.
Frequently Asked Questions
If I take in the sides too much, am I going to ruin the way the fabric drapes around my shoulders?
Short answer: Yes, you absolutely can. If you go too aggressive on the side seams, you’re essentially pulling the fabric taut against your torso, which creates this weird tension that hitches the entire garment upward. Instead of the shirt hanging naturally from your shoulders, it’ll start to “tent” or bunch awkwardly around the armscye. You want to follow your natural silhouette, not turn your favorite tee into a compression shirt. Keep those side seams respectful.
Should I be worried about the side seams puckering if I'm working with a heavy, high-GSM cotton?
Honestly, don’t panic, but yeah, you should definitely be on guard. Heavyweight cotton is stubborn; if your tension is off or your feed dogs are acting up, those side seams will look like a crumpled mess instead of a clean line. It’s usually not the weight itself that’s the enemy, but the bulk. If you aren’t adjusting your presser foot pressure, you’re basically asking for puckering. Check your tension before you commit.
Is it better to taper from the armpit down, or should I start the adjustment lower down at the waist?
If you start at the armpit, you risk turning a relaxed fit into a weird, tight-sleeved vest that pulls every time you reach for something. Unless the armholes are actually massive, I usually suggest starting the taper from the mid-rib or waist down. It keeps the natural drape of the chest intact while cleaning up that excess fabric around the stomach. Don’t kill the silhouette just to make it “slim.”

