I still remember the first time I tried to scale a simple oversized tee design; I thought “large” was just a vibe, not a set of numbers. I ended up with a stack of fifty blanks that looked less like streetwear and more like toddler pajamas because I skipped the actual math. Most people treat understanding garment measurements like it’s some mystical gatekept secret or just a suggestion, but that’s exactly how you end up with a warehouse full of expensive, unwearable mistakes. If you’re just eyeballing the specs because a supplier told you their “fit is standard,” you aren’t building a brand—you’re just gambling with your rent money.
I’m not here to sell you on some “luxury fit” marketing fluff or tell you which silhouette is trending on TikTok this week. Instead, I’m going to pull back the curtain and show you how to actually read a tech pack without wanting to throw your laptop across the room. We’re going to talk about real numbers—chest widths, shoulder drops, and why a single centimeter can be the difference between a premium heavy-weight feel and a total disaster.
The High Cost of Poor Clothing Size Guide Accuracy
Look, I’ve seen it a thousand times: a brand drops a killer collection, the photography is moody and perfect, but then the customers realize the “Medium” fits like a crop top and the “Large” is basically a tent. When your clothing size guide accuracy is trash, you aren’t just losing a sale; you’re building a mountain of returns that will absolutely gut your margins. Every time a customer has to send a shirt back because the proportions are off, you’re paying for shipping twice and losing the trust of someone who probably just wanted to look good in your brand.
It usually comes down to sloppy math during the sampling phase. I see people getting confused between measuring chest width vs pit to pit all the time, and that tiny discrepancy can make a garment feel completely different on the body. If your tech pack doesn’t account for how the fabric actually hangs or how the length hits the hip, you’re basically gambling. You can’t just guess; you need to be precise with standard apparel measurement techniques from the jump, or you’ll end up with a warehouse full of expensive, unwearable mistakes.
Standard Apparel Measurement Techniques You Cant Afford to Ignore
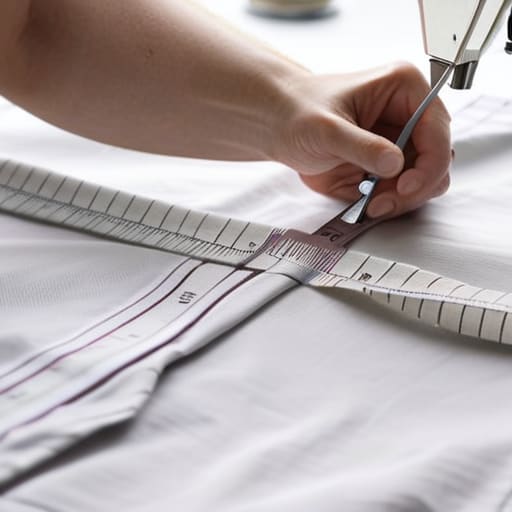
If you’re trying to scale a brand, you can’t just eyeball things. You need a system. Most people start with how to measure clothing flat, which is honestly the bare minimum, but even then, they mess up the basics. For example, I see so many tech packs that confuse measuring chest width vs pit to pit. If you measure across the front from seam to seam, you get one number; if you wrap it around the body, you get another. If your specs aren’t consistent, your customers are going to be returning half your stock because “it looked bigger on the website.”
You also can’t skip the vertical stuff. I always tell my interns that measuring garment length from shoulder is where the real silhouette is decided. A half-inch difference in where that shoulder seam sits can turn a premium heavy-weight tee into something that looks like a cheap hand-me-down. Don’t just throw numbers into a spreadsheet and hope for the best; if you aren’t using standard apparel measurement techniques consistently across every single sample, you’re just gambling with your production budget.
Five Ways to Stop Guessing and Start Measuring Like a Pro
- Stop relying on “Small, Medium, Large” as a personality trait; every brand has a different fit, so if you aren’t measuring the actual chest width and shoulder drop, you’re just playing a guessing game with your customers’ money.
- Always measure your samples while they are laying flat on a hard surface, not draped over a mannequin or bunched up on a table, because gravity is a liar and it’ll skew your numbers every single time.
- Build a “tolerance” buffer into your tech packs—if you’re telling a factory a sleeve length is 24 inches, tell them you’ll accept 23.5 to 24.5, because expecting mathematical perfection from a sewing machine is a fast track to a headache.
- Don’t just measure the garment; measure the human, too. If you’re selling oversized streetwear, make sure your size guide explains the difference between “body measurements” and “garment measurements” so people don’t think the shirt is actually broken when it’s just meant to be baggy.
- Test your measurements on actual people, not just flat fabric. A garment might look perfect on a table, but once a human body fills that space, those seam allowances and ease measurements are the only things standing between a good fit and a total disaster.
The Bottom Line on Getting Your Specs Right
Stop treating your size guide like an afterthought; if your measurements don’t match the actual physical garment, you’re just inviting a mountain of returns that’ll eat your entire margin.
Accuracy isn’t just about “fit”—it’s about technical integrity, so make sure you’re measuring consistently across every single piece in your production run to avoid that nightmare where every batch feels different.
Invest the time in a proper tech pack now, because guessing on your measurements is the fastest way to turn a creative vision into a box of expensive, unwearable mistakes.
Frequently Asked Questions
If I'm using a tech pack, do I actually need to measure every single piece myself, or can I trust the factory's specs?
Look, I get the temptation to just nod and trust the factory’s spec sheet, but please—don’t do that to yourself. If you haven’t physically held the sample and measured it against your own ruler, you don’t actually know the fit. Factories have their own “standard” tolerances that might be way looser than yours. Trust, but verify. Measure every single piece yourself once, or you’ll be paying for a mountain of returns later.
How much of a "tolerance" should I really allow for before a garment is considered a defect?
Look, if you’re expecting every piece to be a mathematical miracle, you’re going to go broke. In the real world, we use “tolerance”—basically the wiggle room for human error. For most streetwear blanks, a +/- 1cm (about half an inch) on major points like chest or length is standard. Anything beyond that and you aren’t just “varied,” you’re inconsistent. If your sleeves are shrinking by two inches, that’s not a tolerance; that’s a defect.
When am I looking at a size chart, should I be measuring the person or the actual fabric?
Look, this is where most people trip up. You aren’t measuring the human; you’re measuring the garment. If you’re looking at a size chart, those numbers represent the actual fabric laid flat on a table. If a brand tells you a medium has a 22-inch chest, they mean the piece of clothing measures 22 inches from seam to seam. Always assume it’s the garment dimensions, otherwise, you’re going to end up with something way too tight.

